Optical Tweezers for Biology
WHAT ARE OPTICAL TWEEZERS
Optical tweezers are used to finely capture and move microorganisms or anything microscopic. For this experiment, the focus was to capture biological specimens, and measure the amount of energy they have in their tails. It is a method in which they use to thrust themselves around in a solution. With that it can be determine how much energy is produced by the tail in order for them to escape a laser trap.
The first thing that was done was the set up capturing apparatus. To start this the first things that should be done is preparing the fiber optic laser that will be used. There should be equipment in the room to allow for practice before the real one should be done.
MAKING THE LASER
Following up with the apparatus set up is the laser set up. There should be instructions in the lab to help with the set up. A short simplified version of it would be as follows:
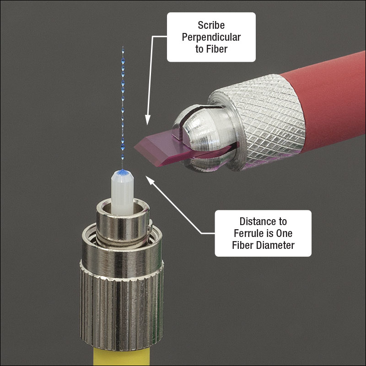
1. Strip the plastic from the fiber optic wire. There should be a tool
2. Set up two part polymer, with a ratio of 2:1, A to B. It is very dense and viscous. Mix very well in a mixing tray and pour into a syringe.
3. Using a PC head, slowly push the polymer into the tiny hole until the polymer slowly comes out the other end.
4. Push the now stripped fiber optic laser into the tiny hole. DO SO SLOWLY OR IT WILL BREAK.
5. Once all the way through, let dry/cook in the over for the allotted time.
6. Once out of the oven, cut the leftover off with a diamond tip and dispose of it. There should be a bulb of polymer left at the tip as well as some of the fiber left sticking it. It is important to have this or there will be cracks in it when sanding down.
7. Now begin sanding down the tip and polishing it. It should be done in figure 8 motions as follows in the book provided. There are metal pads to help with the sanding process. The grit should become finer and finer as the polishing gets finer. There is a microscope to observe the polishing to ensure quality.
8. Once polishing is complete and it has passed all the benchmarks, the apparatus can then be set up.
NOTE:
-Any glass that is disposed of should be in a glass container or have tape around it to prevent hazard to anyone handling the garbage -Wear safety glasses at all times while working with the fiber -The two part polymer should be refrigerated
APPARATUS SET UP
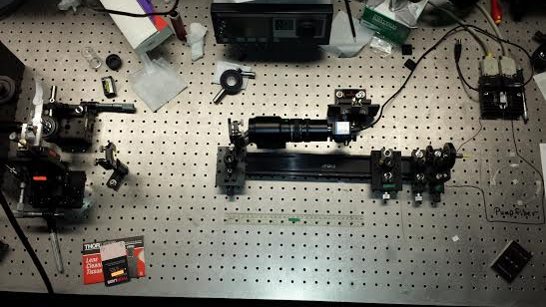
After the fiber optic is set up to be a laser, finish setting up the apparatus. Our apparatus consisted of a laser which bounced off of a mirror into a one way mirror. This is then further reflected up to the lens of the microscope. At side of it we have a stand which moves the glass slide in all 3 different vectors. The x,y and z plane.
For the Winter, another addition was added to the apparatus. That was an machine that would oscillate the mount slowly in sin function in order to produce a small movement of the beads. This method was to be used to measure the drag force produced. Since the beads don't move. This is a excellent option to take to measure their movements.
The slide mount was changed in order to help with the stability. The original mount only held down the slide by one axis. The new slide mount held the slide down from the top as well as the sides.
CREATING THE SLIDE
This now leads to the set up of the slides. There are instructions located with the lab. Here is a shortened version of the process.
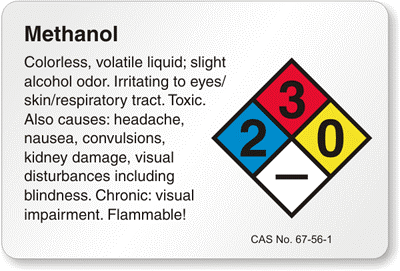
1. Using methanol which is flammable, carefully clean the slide with it and lens cleaning tissue provided by Thor labs.
2. Using the same method clean the coverslip with methanol and lens cleaning tissue.
3. Using a microcentrifuge tube transfer some of the glass beads or biological sample to it.
4. This step is only if it is difficult to capture the beads or biological species. Add drops of Methyl Cellulose to the microcentrifuge tube with the beads and shake.
5. With tape, which should have adhesive on both sides, cut in half so that there are two long narrow pieces.
6. Place the tape of the slide parallel to one another. There should be space in the middle for the solution to be added in later. Make sure to have the tape down as flat as possible to prevent any leakage into the tape.
7. The coverslip should now be added on top of the two pieces of tape, creating a small boxlike area for the solution to be transferred into.
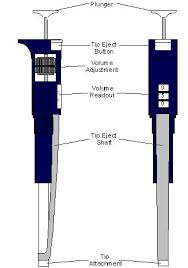
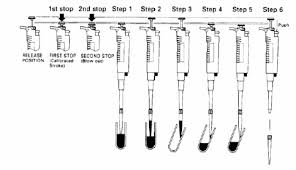
8. A micropipet should be present to use. Set to 25 microns, attach the tip, and begin to extract the solution from the microcentrifuge tube. There are methods to using the micropipet. Push down until it stops, but if you push all the way it should still move. This is meant to get out all the fluids in the tip.
9. Shake up the microcentrifuge tube to get a uniform concentration throughout.
10. Micropipet the solution from the microcentrifuge tube to the slide, placing the tip of the pipet next to the slit.
11. Only put enough so that the entire area under the coverslip and between the tape is filled with solution.
12. Using nail polish seal off the ends of the coverslip so that the solution won't be able to escape. This will make a close system.
13. When loading the slide have the coverslip side face down at the microscope lens
14. Add some immersion oil to the tip of the microscope lens
15. Lower the slide down until the oil and coverslip merge
16. Now observations can be made
NOTE:
-Methanol is flammable and should be used away from fire. -Methanol evaporates much faster than water, so a cap must be kept on the container to prevent unnecessary loss of methanol. -Gloves must be work to prevent the oils from the hands to be transferred to the coverslip and slide. -A new tip for the pipet should be used every time to prevent cross contamination. -Immersion oil should be clean once leaving the lab.
BIOLOGICAL ADDITIONAL INFORMATION
There is a solution known as methyl cellulose. It has the ability to hinder and slow the movement of any microorganism as well as other microscopic mass present. This is the way that we bypassed the problem of the microscopic masses moving pass our field of view. They move extremely quickly and any twitch to focus or lock on to the target would shake it around making it even harder to capture.
Note:
-The methyl cellulose should be stored in the fridge. If put out for too long it could denature.
MICROPIPET ETIQUETTE
There are a few things that should be known about the micropipet before using it.
1. Always keep the micropipet vertical and prevent any fluids from going to the pressing mechanism
2. Always use a new tip when changing samples, working with new samples, or using a different fluid to prevent cross contamination
3. All the mechanisms needed for the micropipet is located in the handle.
4. When pressing there should be a button to draw in and push out the liquid in the tip. When pressing down there should be two different forces. The first press should be easier. There should be a resistance, and then a final extra push to fully press it down. The full press is to get out all the fluids and not meant for in-taking fluids.
5. Different micropipets have different mechanism to change the amount it would intake per press.
6. There is a dispenser on the handle to eject the tip when it is used up
PROCESS OF CAPTURING
The first thing to try to capture are glass beads. The glass beads are good practice as they have a clear path and direction that they are traveling in. They don't have a tail and will therefore move in a easily predictable path.
There are two types of beads to pick from. There is a vial that had PEG and one that does not contain PEG. PEG is a short name for Polyethylene glycol. It is meant to prevent the beads from being trapped against the glass surface of the coverslip or the slide. The PEG is better for starting to practice and capture the beads. The ones without the PEG is great for fine tuning the apparatus to focus in more on the beads.
Note:
PEG must be stored in the fridge, otherwise bacteria will form on the beads. This will destroy the beads and make them unusable.
Once you have become good enough at capturing beads, the next step is to catch biological organism. This follows the same process as the beads with the preparation of the slide and the
APPLIES PHYSICS
In progress
