Slide Mount Apparatus: Difference between revisions
No edit summary |
No edit summary |
||
| Line 17: | Line 17: | ||
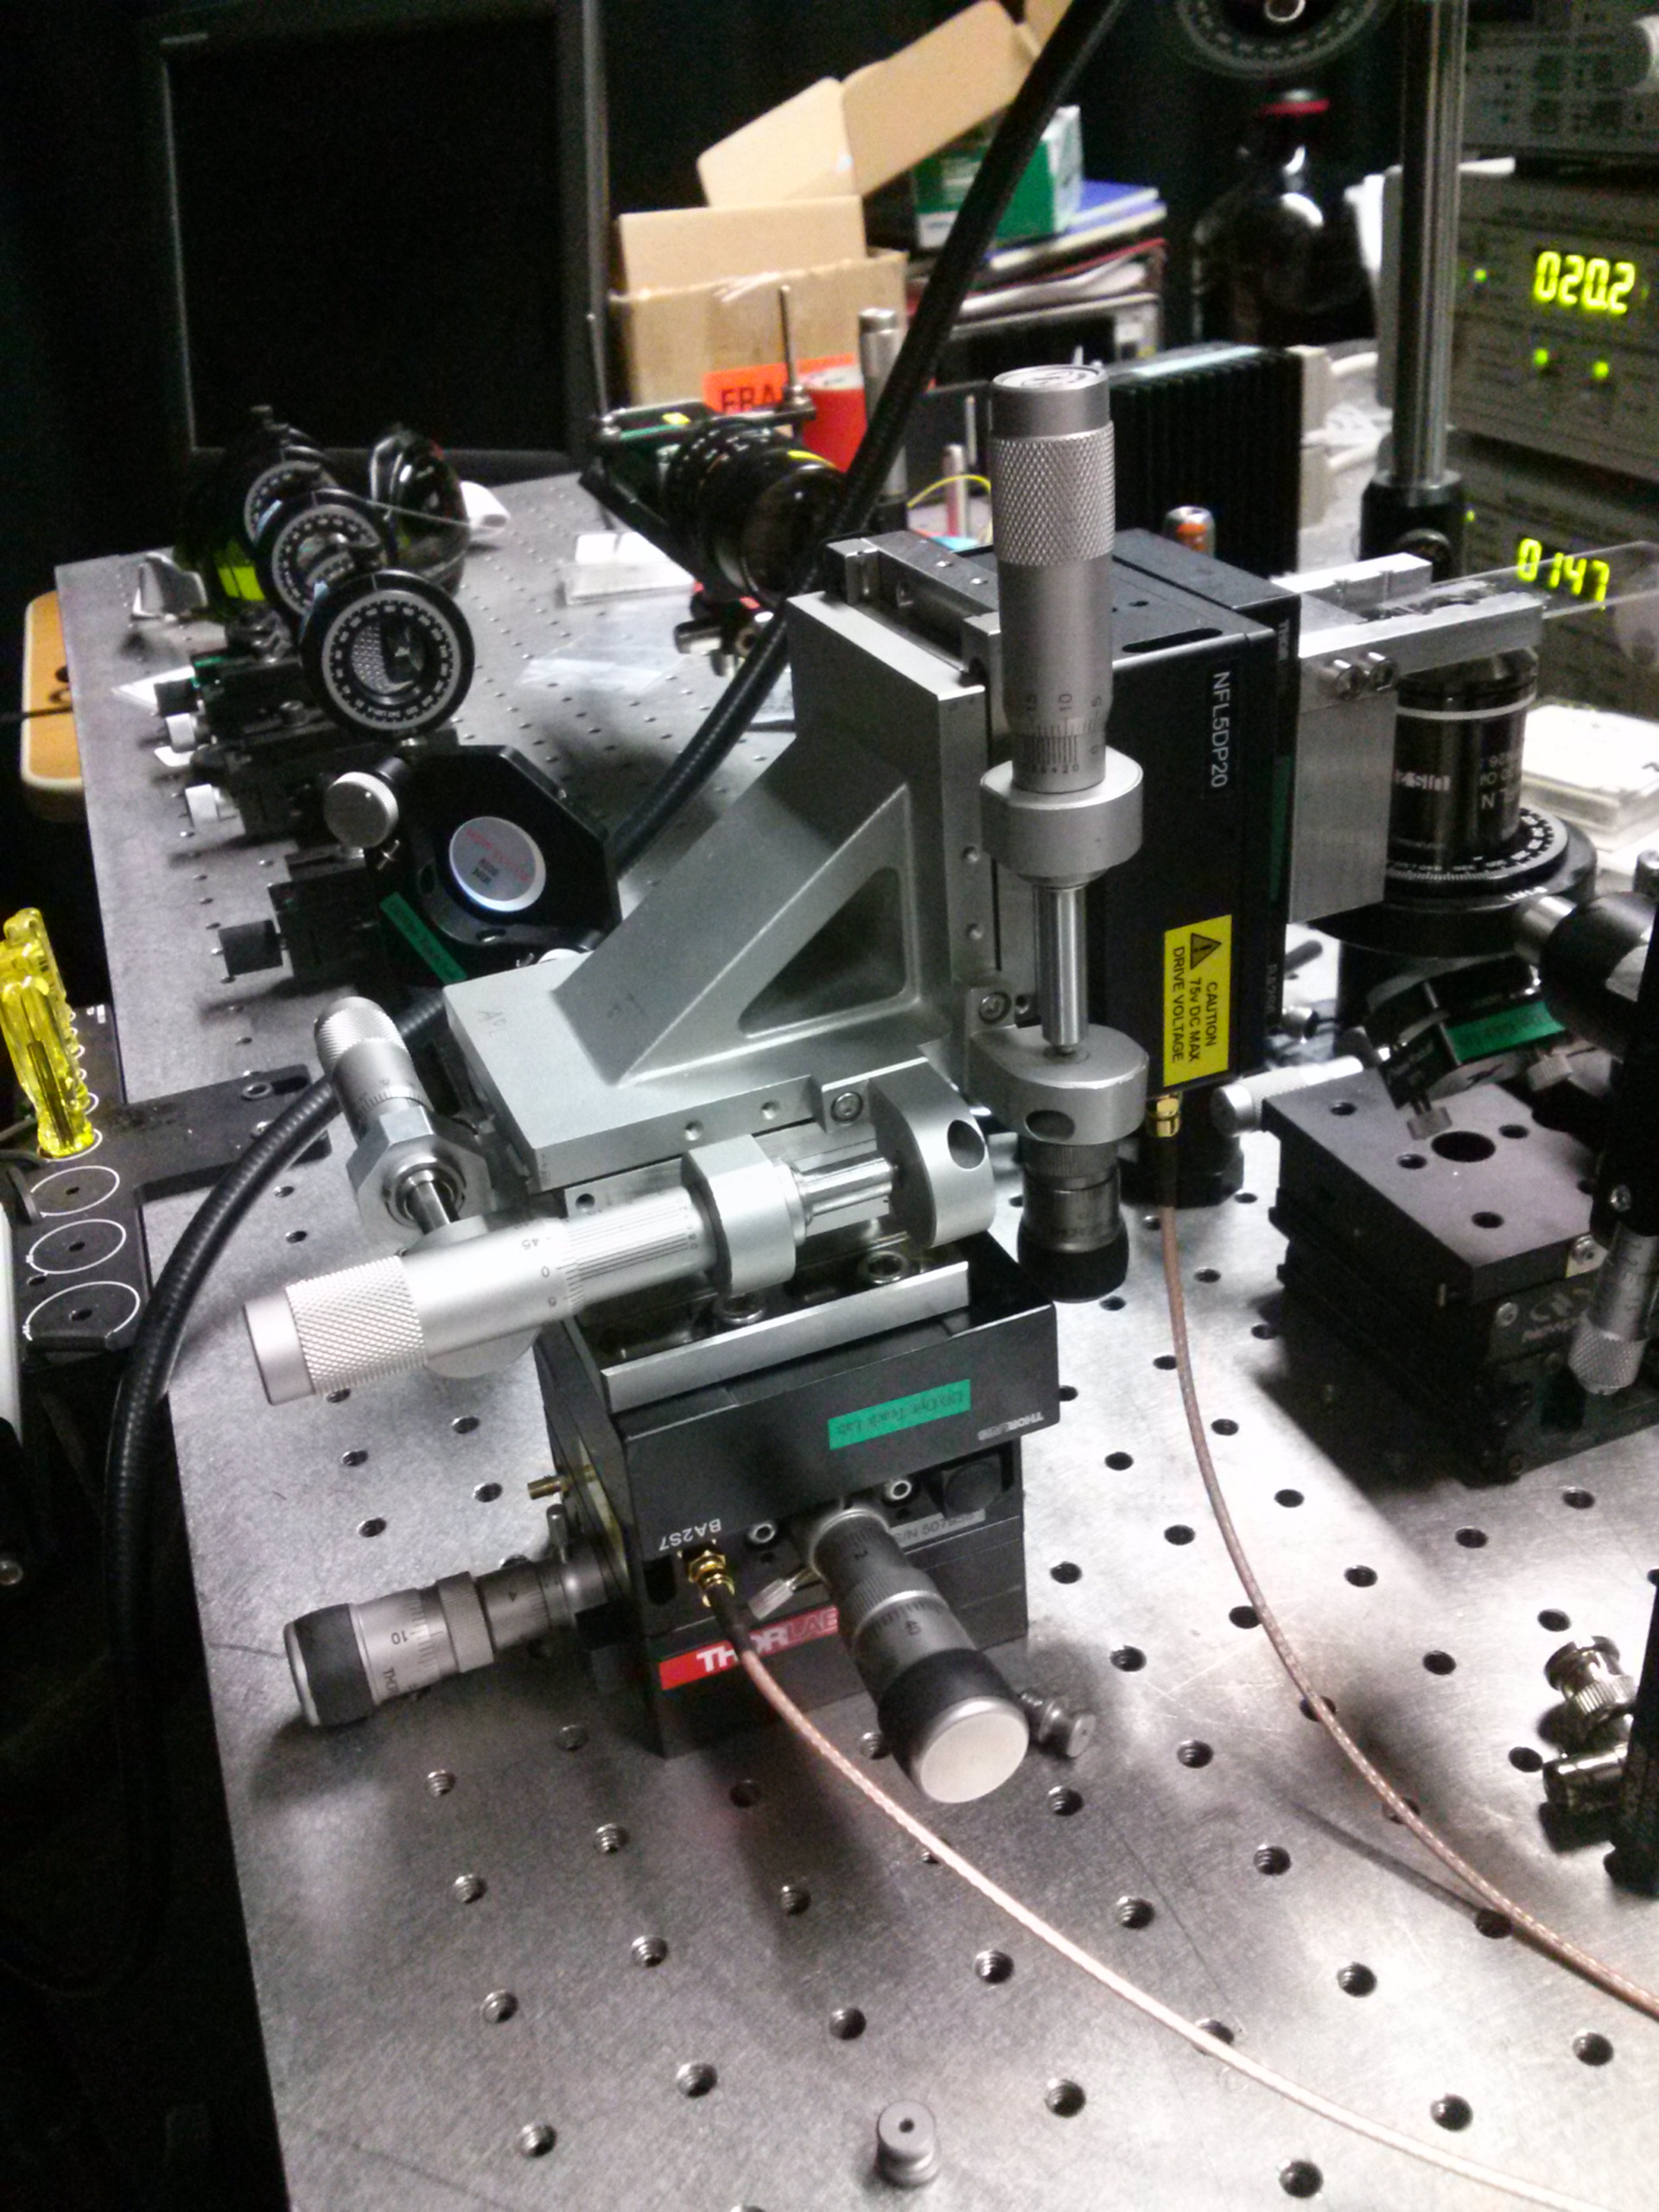
First, one of the Thorlabs translation stages was bolted to the table. Be sure to approximate the distance away from the objective needed before any construction occurs. Orient the adjustment knob facing out from the table. Next, Mount another Thorlabs stage with the adjustment knob oriented 90 degrees from the first stage. This will enable electronic control in both horizontal directions. Next, on the Newport three dimensional stage, mount the final Thorlabs stage and the slide mount onto the stage's vertical face. Finally mount the Newport stage onto the two Thorlabs stages already on the table. Orient the vertical Thorlabs stage and slide mount to face the microscope objective and adjust the position of the slide mount if necessary. An image of the final product is displayed below: | First, one of the Thorlabs translation stages was bolted to the table. Be sure to approximate the distance away from the objective needed before any construction occurs. Orient the adjustment knob facing out from the table. Next, Mount another Thorlabs stage with the adjustment knob oriented 90 degrees from the first stage. This will enable electronic control in both horizontal directions. Next, on the Newport three dimensional stage, mount the final Thorlabs stage and the slide mount onto the stage's vertical face. Finally mount the Newport stage onto the two Thorlabs stages already on the table. Orient the vertical Thorlabs stage and slide mount to face the microscope objective and adjust the position of the slide mount if necessary. An image of the final product is displayed below: | ||
[[File:Slide Mount.jpg]] | |||
'''Using Slide Mount Apparatus''' | '''Using Slide Mount Apparatus''' | ||
A few tips for using this apparatus effectively are: Use the Newport adjustment knobs for large adjustments, save the Thorlabs stages for finer tuning. Always have the vertical Thorlabs stage connected to the piezo controller. This will make focusing the laser on the cover slide, much easier as you won't have to touch the apparatus at all. Finally, BE CAREFUL when adjusting the slide vertically. If the slide is pressed too hard against the microscope objective, the coverslip will crack, which is dangerous to the microscope objective. | A few tips for using this apparatus effectively are: Use the Newport adjustment knobs for large adjustments, save the Thorlabs stages for finer tuning. Always have the vertical Thorlabs stage connected to the piezo controller. This will make focusing the laser on the cover slide, much easier as you won't have to touch the apparatus at all. Finally, BE CAREFUL when adjusting the slide vertically. If the slide is pressed too hard against the microscope objective, the coverslip will crack, which is dangerous to the microscope objective. | ||
Revision as of 22:39, 21 August 2014
Microscope Slide Mount
For several reasons, the microscope slide mount is important piece of the optical tweezers set up. First, it needs to be sturdy enough to damp vibrations that move through the table and the lab. Since the Brownian motion measurements are observing particle oscillations of fractions of micrometers, any instability in the slide mount will skew the data. Secondly, it needs to be adjustable in all three dimensions focus the sample, and scan over the slide surface. Thirdly, the mount must be electronically controlled in the horizontal directions to perform Stokes measurements. Ideally it will be electronically controlled in the vertical direction to finely focus the objective, without having to touch the slide mount.
Slide Mount Apparatus Components
First a Newport 462 Series three dimensional translation stage was obtained as a starting point for our slide apparatus. The adjustment knobs on this particular mount are good for larger scale adjustments but lack fine tuning capability. Additionally this mount alone cannot be electronically controlled. The Newport translation stage is displayed below.
Next, three Thorlabs NFL5DP20 5 mm piezo translation stages were obtained to modify the Newport stage and enable electronic control. Additionally, a Thorlabs 3-axis Piezo Controller, and several BNC cables are needed to drive the Thorlabs stages.
Finally, the custom slide mount piece (see picture) will need to be attached to the apparatus in order to actually mount the slide on the apparatus.
Slide Mount Apparatus Construction
The apparatus may be constructed in several different manors, but suggested method will now be described.
First, one of the Thorlabs translation stages was bolted to the table. Be sure to approximate the distance away from the objective needed before any construction occurs. Orient the adjustment knob facing out from the table. Next, Mount another Thorlabs stage with the adjustment knob oriented 90 degrees from the first stage. This will enable electronic control in both horizontal directions. Next, on the Newport three dimensional stage, mount the final Thorlabs stage and the slide mount onto the stage's vertical face. Finally mount the Newport stage onto the two Thorlabs stages already on the table. Orient the vertical Thorlabs stage and slide mount to face the microscope objective and adjust the position of the slide mount if necessary. An image of the final product is displayed below:

Using Slide Mount Apparatus
A few tips for using this apparatus effectively are: Use the Newport adjustment knobs for large adjustments, save the Thorlabs stages for finer tuning. Always have the vertical Thorlabs stage connected to the piezo controller. This will make focusing the laser on the cover slide, much easier as you won't have to touch the apparatus at all. Finally, BE CAREFUL when adjusting the slide vertically. If the slide is pressed too hard against the microscope objective, the coverslip will crack, which is dangerous to the microscope objective.